

Concrete pools are classic.
Even though our expertise lies within inground fiberglass swimming pools, we’ll be the first to tell you that concrete offers some things that other pool types can’t. These things include unlimited shapes, widths, and depths, and all tile or pebble surfaces.
On the flip side, the surfaces can be rough, and concrete pools can require a lot of upkeep. They also tend to be the most expensive option when it comes to building and maintaining an inground pool.
Because concrete pools don’t come cheap, you may find yourself pondering the challenge of a DIY concrete pool. So, what is required when building a concrete pool, is it really that hard to do, and how much will it cost? We answer all of these questions and more in the following sections.
DIY Concrete Pool Materials
Whether you’re building your pool on your own or you’re getting help from contractors along the way, here are the materials that you'll need to build a concrete swimming pool:
- Excavator
- Shovels
- Level
- Poles
- Rake
- Rope or string
- Rebar
- Metal ties
- Piping and plumbing equipment
- Pump and filter system
- Concrete
- Gunite or shotcrete equipment
- Straight edge and trowel
- Waterproofing material
- Plaster
- Waterline tile
- Coping and patio materials
- Hand tools
This is a long list of pool building materials, but it is by no means exhaustive. There is a lot that goes into building a concrete pool, so you can expect to need various other tools and supplies along the way.
Before we move on we must say, although this would be one heck of a DIY project, we do not recommend it at all. For the sake of your backyard, your calendar, your bank account, your sanity, and the sanity of those around you, hire a professional pool builder.
Despite that warning, if you're still curious, read on.
How to Build Your Own Concrete Pool
We'll briefly walk you through all the steps of building a concrete pool, but again, we strongly advise that you consult with a contractor to help keep your concrete pool project on the right track.
Pro tip: Before you start digging, be sure you have your design ready and approved and your pool permit in hand. If you’re still in the beginning phases of your research, you’ll definitely want to look at this list of first steps to getting an inground pool before going further.
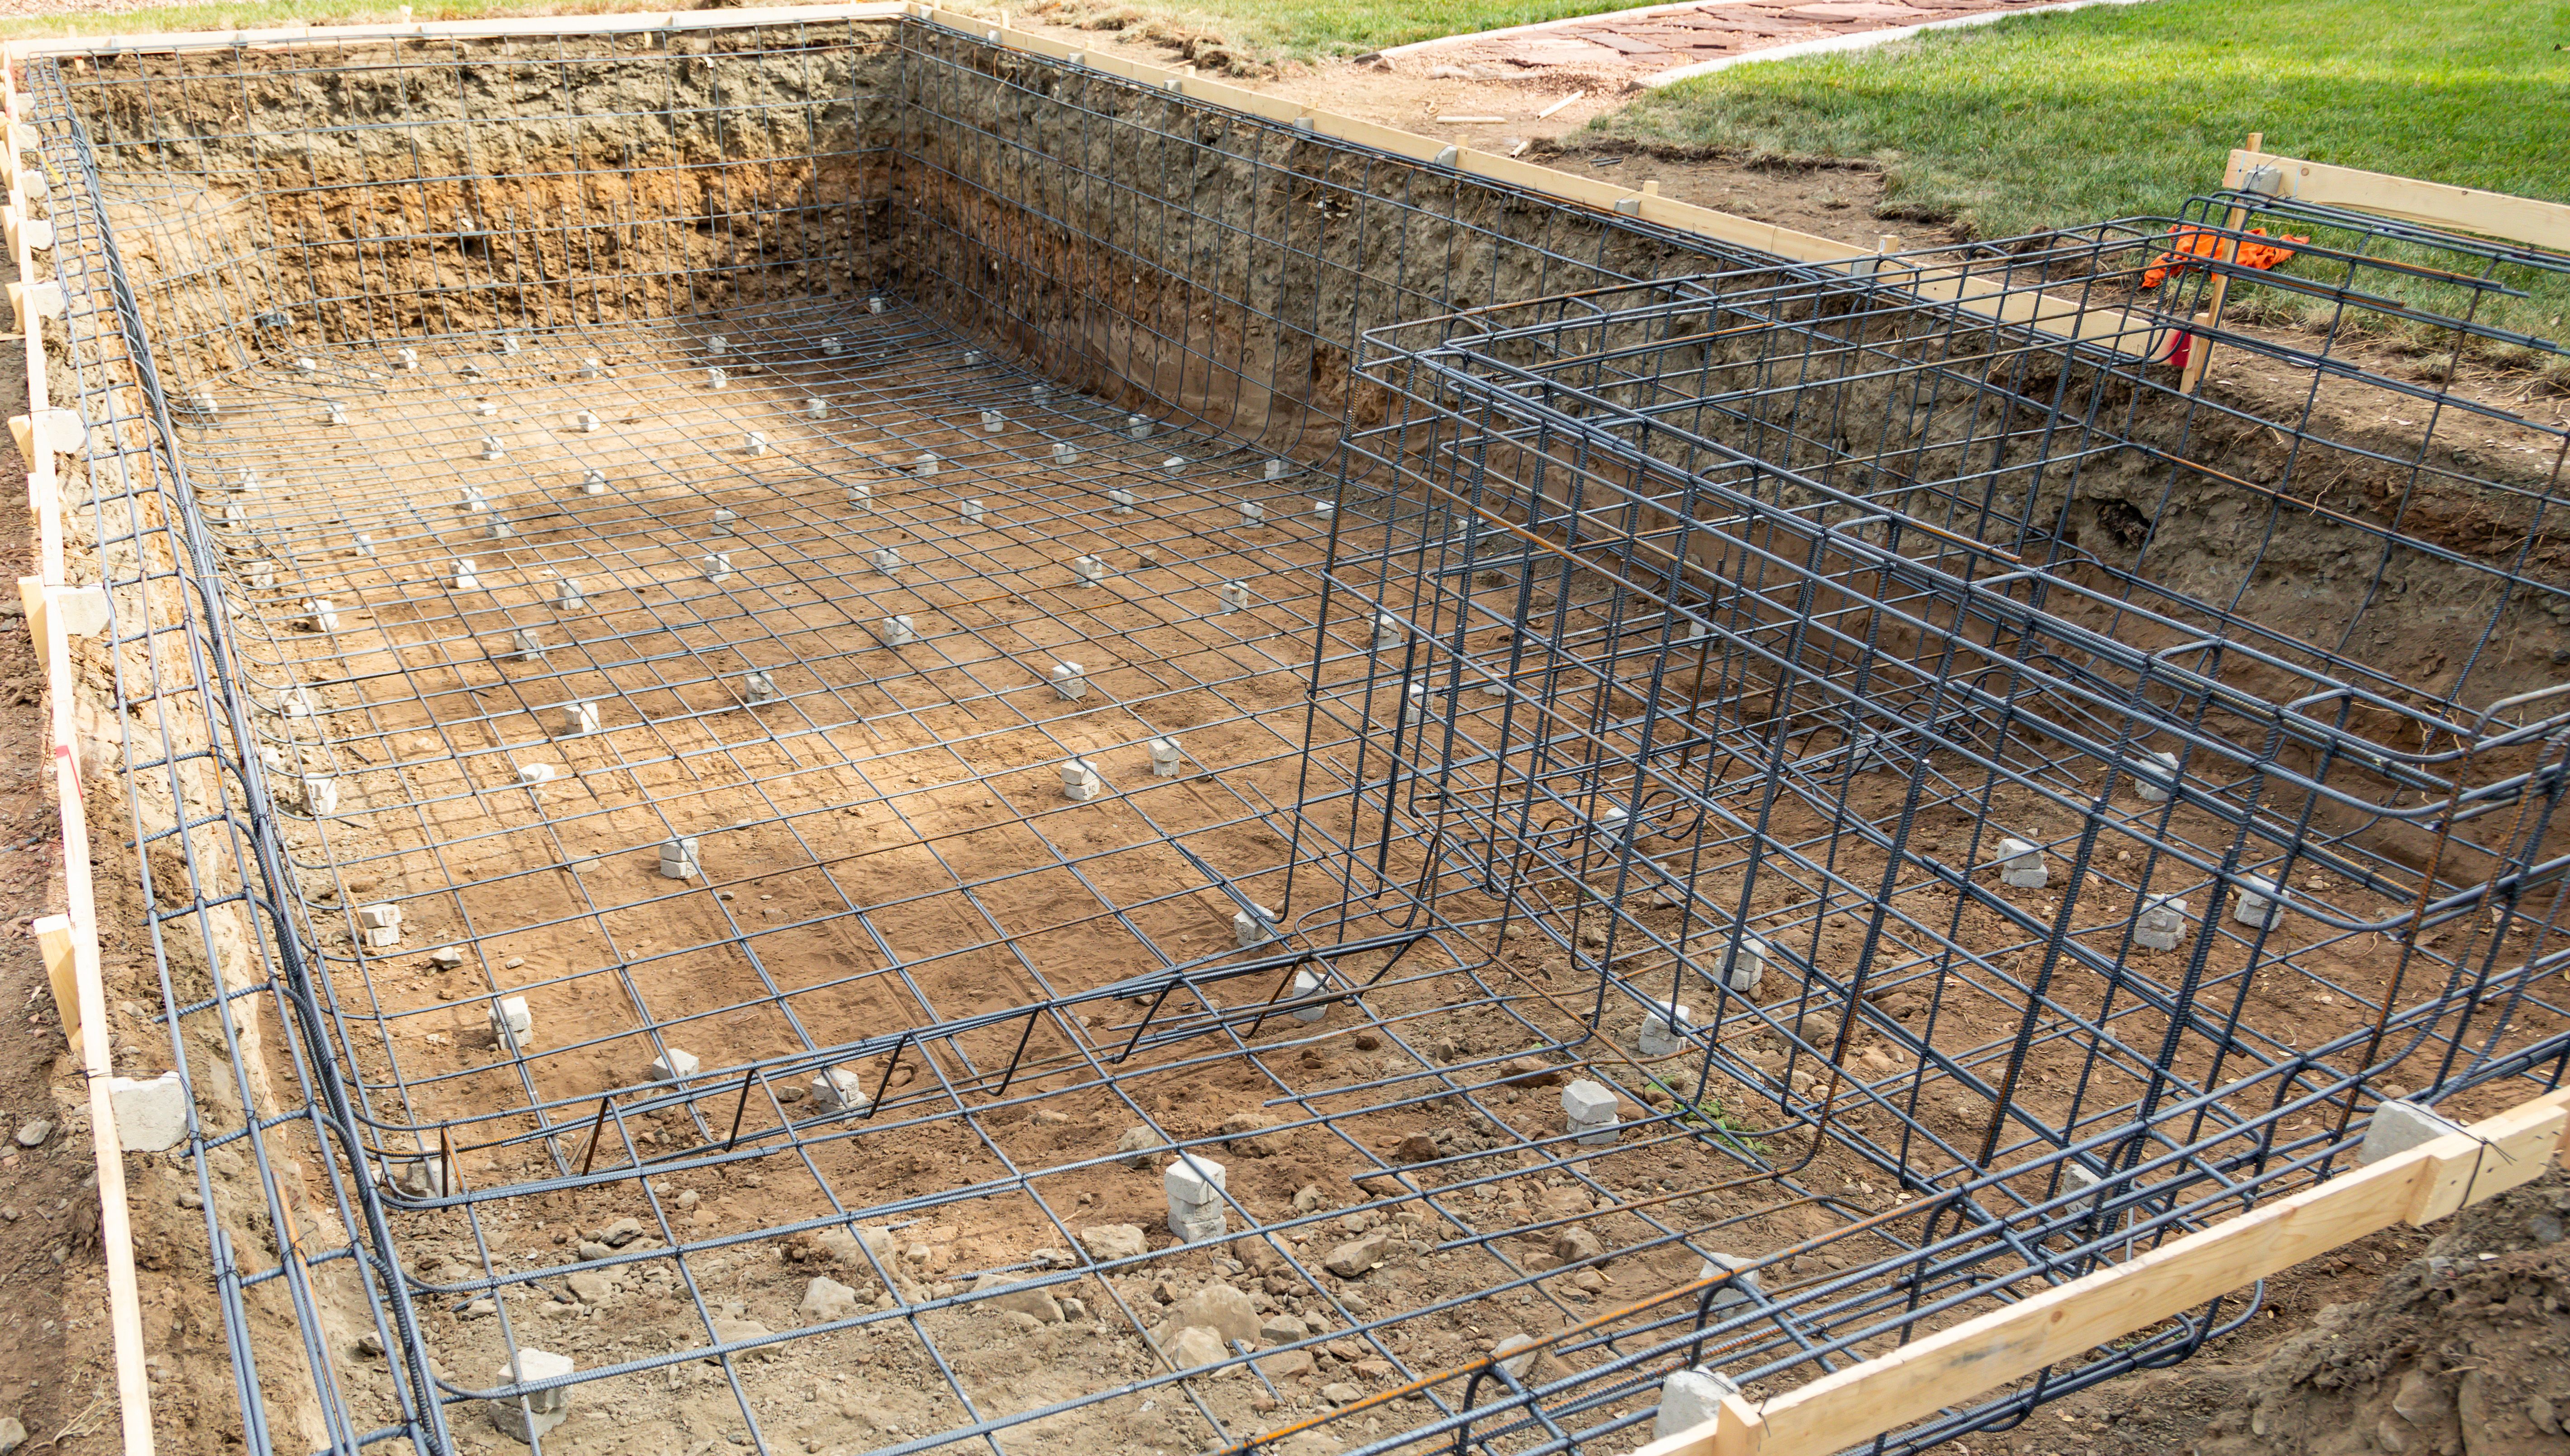
Step 1: Excavation
Assuming you’re prepared with a design and permits, and you’re certain that you won’t hit a utility line, your first step will be to excavate the hole. You can contact your local records or planning office to get a copy of your home’s plans, or you can visit the Underground Safety Alliance 811 website to find out if there are any utility lines running under your property.
To dig the hole, you’re going to need an excavator. You can probably rent one by the day, or you can hire a contractor to do the excavation for you.
You also need to consider what you’re going to do with all the dirt. Unless you have tons of space to store the dirt on your property, plan to have it hauled off that day to get it out of the way.
After digging the hole, rake the bottom and sides of the pool and check that it is level.
Pro Tip: Be absolutely certain that the pool is level. Mark the area with stakes and string to keep everything level as you continue working.
Step 2: Make Your Rebar Grid
Your next step is to build a rebar grid across the entire pool and tie it all together with metal ties. It’s as much work as it sounds like, and although you may be tempted, do not skip this step. It’s the rebar that gives your pool tensile strength (AKA flexibility), which helps to safeguard the pool from structural damage.

Step 3: Plumb and Wire the Pool
Lay down your plumbing pipes for your pool’s circulation system (or finish what you started before you made your rebar grid). Every pool is different, so be sure to follow your design and your concrete pool plans.
You must cap the openings so that you don’t clog the pipes with concrete in the next step. Hook up the plumbing to the pump and filter system, and get a pool plumber to help you or to at least verify that everything is done correctly. You don’t want to realize that you made a mistake after everything is covered in concrete.
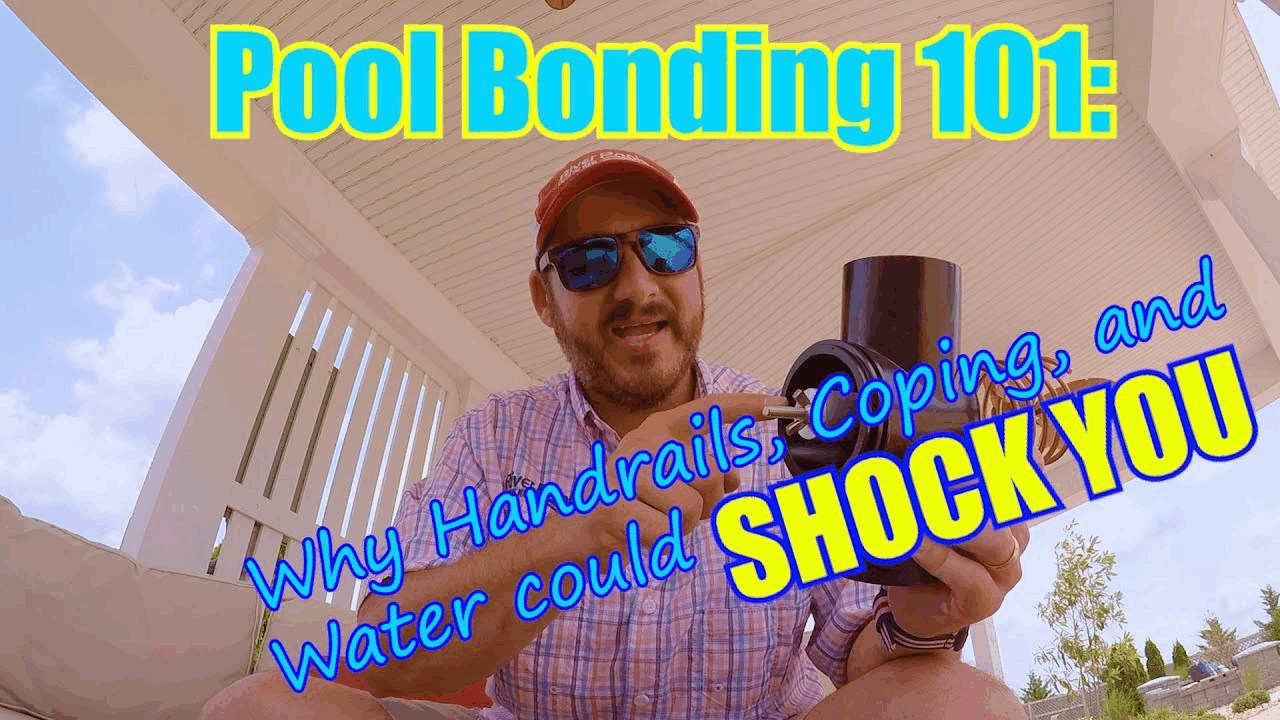
Wire the electrical parts of the pool, like the filtration system, lights, and anything else that needs to be hooked up to a power source. Also, make sure the pool is bonded properly before going forward.
Pro Tip: Get an experienced pool plumber to oversee or at least double-check your plumbing. And hire a licensed electrician to double-check your electrical work.
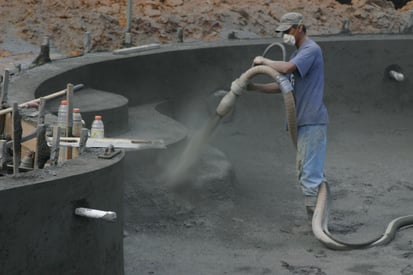
Step 4: Time for Concrete
Warning: This is one of the messiest, loudest, and most time-consuming parts of the entire project. In other words, don't wear your good shoes and wear protective earplugs. To start, you have to prepare the concrete (typically shotcrete or gunite) on site. Once it’s prepared, it’s applied onto the bottoms and sides of the pool. Gunite pools typically require a skilled technician to properly apply the sprayed concrete, so you may not be able to DIY a gunite pool if you're not already an experienced "nozzleman."
Keep in mind the thickness of the concrete as you apply it to the walls and floor of your pool. It should be about 6 inches thick on all sides. Once all of the shotcrete or gunite is in place to form the floor and walls, you’ll have to go back in and smooth it all out with trowels and straight edge tools.
STOP: Before you can continue your concrete pool construction, you have to wait for the concrete to cure. This takes approximately 28 days. During the 28 day curing period, you’re going to need to spray the surface of your pool with water 2-3 times per day.
Pro tip: Don’t get lazy. Spraying the pool with water is crucial to the end result and the quality of the pool’s structure.
Step 5: Waterproofing and Waterline Tile
To waterproof your swimming pool, you need to roll or spray on a sealant before going forward with surfacing your pool. This will prevent any water from permeating through the structure.
Applying waterline tile along the top six inches of the pool will prevent any unsightly staining where the edge of the water meets the surface of the pool. It will also give you another chance to customize your pool with your favorite accent colors or designs.
Waterproofing and waterline tile are both optional, but they are highly recommended.
Step 6: Coping and Patio
The coping is the material just around the edge of the pool that integrates it into the rest of the deck or patio. It’s often made using concrete, but it can be formed using brick, pavers, stone, and other options.
Next, you’ll want to finish the pool deck or patio using your material of choice. To save money, you might want to go with concrete, but you have many other options including natural stone, pavers, wood, travertine, or brick.
Step 7: Surfacing Your Concrete Pool
You’ll have to make a choice between plaster (cheaper but rough), Pebble Tec/aggregate (more expensive and can be bumpy), or tile (most expensive but looks amazing). Read more about each of these concrete pool surfacing options here.
You can also apply epoxy paint or ecoFINISH, but ecoFINISH is not something you can DIY. Most people will choose traditional and cost-effective plaster, whether they are DIYing their pool or hiring it out to a contractor. Let’s go over how to apply plaster in more detail.
Did we mention we do not recommend any DIY pool construction project?
DIY Pool Plaster
Plaster is a mixture of cement, sand, marble dust, pigment, and water. As we explain in our article on swimming pool colors, plaster can be dyed a wide range of colors including white, blue, grey, or sandstone. Keep in mind that most colors will end up appearing as a shade of blue because of the water’s blue hue.
Like shotcrete and gunite, plaster is typically shot onto the pool’s surface and smoothed out with a trowel.
Step 8: Starting Up Your Pool
You're in the home stretch, it is almost time to fill your pool up with water and get in. Your plaster will still be curing for yet another 28 days, and there are a few things that you have to do during this time.
First, you must keep your water properly balanced to prevent stains on your fresh plaster, but chlorine should not be introduced for at least the first 48 hours.
The pool also needs to be brushed at least two times a day for at least 10 days after filling the pool with water to remove any remaining plaster dust. (You definitely don’t want to be swimming in that.)
Pro Tip: Don’t start up your pool heater until all of the plaster dust is eliminated, and don’t swim in it (people or pets) until the water is sanitized and balanced.
Here’s one word of advice that’s worth repeating: when in doubt, ask for help. It’s better to do it right the first time around than to spend more money trying to fix your mistakes later.
DIY Concrete Pool Problems
It’s likely that you will run into some time delays due to weather or scheduling.
Since you’ll likely be working with different specialists as you go through the building steps, you’ll have to plan around a range of schedules, which can extend the time that it takes to build your pool.
Second, and this one is important, you have to remember that a DIY concrete pool means having a very limited warranty, if you have a warranty at all. This means that if something goes wrong with your inground pool, you will be responsible for the repairs and the cost to fix it.
Third, you need to be aware that the concrete is going to be messy and your yard will be in disarray for months. There’s going to be a lot of overspray to clean up, and you need to be careful not to cover anything important with concrete (like pipe openings).
At the end of the day, there is a long list of things that could go wrong with your concrete pool construction. You could install the plumbing incorrectly, forget to bond the pool properly, or apply the concrete too thin. The important thing is to take the time to do it right and ask for help if necessary. Building a concrete pool can take 3-6 months on average, so there is no point in trying to rush through it.
Remember when we said you should hire a professional to build this pool for you? We're standing firmly by that recommendation.
DIY Concrete Pool Maintenance
Congratulations! By this stage, your DIY concrete pool is in the ground and all you have to do is maintain it and keep it in good shape. So, what does that include?
You could hire a pool service company to help you maintain your pool, but since you are a DIYer at heart, you’re probably going to want to do this by yourself. Here’s what you’ll need to add to your weekly routine:
- Checking and balancing chemicals
- Brushing your pool surface with a steel brush
- Cleaning out your pool
- Running the filter for two circulations per day
It is very important that you regularly check the chemistry of your pool water and balance your chemicals accordingly. At least once per week, brush the entire surface of your pool with a steel brush to keep algae at bay. It’s also a good idea to remove debris and vacuum out dirt regularly. A robotic pool cleaner could help make this a bit easier for you.
DIY Concrete Pool Acid Washing
You know how we said that all you have to do is brush the surface, balance the chemicals, and remove dirt and debris? Well, that’s all you have to do on a weekly basis, but there are a few other important things that you have to do every few years. One of those things is acid washing the pool.
Why Do You Need to Acid Wash Your Concrete Pool?
Concrete pool surfaces (particularly plaster) are prone to algae and staining from water, dirt, and debris. Acid washing removes a thin layer of plaster, taking all of the gunk with it and giving your pool a fresher look. You can even think of it as a chemical peel for your swimming pool.
Acid washing can cost at least $500 each time if you hire it out to a pool service company, and it might need to be done about every 5 years. That price doesn't include the cost to refill your pool and replenish chemicals. While you can do it yourself, it involves handling some dangerous chemicals and doesn’t leave much room for error.
How to Acid Wash Your Concrete Pool
Warning: we strongly recommend that you hire someone to do this for you if you have never acid washed a pool before.
If you feel confident working with hazardous chemicals and are familiar with the process, here’s a brief recap of what you’ll need to do:
First, you’re going to need to get some muriatic acid. This is a dangerous chemical, and handling it requires that you wear protective gloves, clothing, eyewear, and a respirator.
Before you start, you’ll have to drain your swimming pool (this in itself isn’t a risk-free process because your pool could float!). Your pool also needs to be cleaned and cleared of debris.
For the actual acid washing process, you’ll first need to dilute the acid in water. You do this by adding acid to water, and NEVER water to acid. You should end up with a mixture of about 50% water and 50% acid.
Be sure to wet the walls of your pool with a water hose. Then, starting at the deep end, pour your muriatic acid and water mixture over the walls. Scrub the walls quickly and then rinse them with water again. Do this all the way around the pool, and make sure to neutralize the water collecting in the deep end with soda ash as you go.
You’ll need to be very thorough when removing the acid mixture from the walls, and watch out for the floor of the pool. If there is prolonged contact, you could wear down more of the plaster than you wish to.
Again, we suggest that you seek help for this, at least the first time.
We want to give you the full step-by-step breakdown, but frankly, we’re fiberglass pool guys and we haven’t had to worry about acid washing in a long time. That’s something that belongs in the concrete pool world.
Pool Center provides a more in-depth walkthrough of this process if you really want to give it a go.
DIY Concrete Pool Resurfacing
Here’s the thing, acid washing refreshes the surface of your pool, but it also strips a little bit away each time. About every ten years or so, you’re going to have to redo the plaster, aggregate, or tile on your swimming pool.
How much does resurfacing your pool cost?
This really depends on the size of your pool and the material that you use to resurface it. Typically, you can expect to spend around $10,000-$20,000 or more to resurface your swimming pool.
Specifically, plaster will cost $3.50 and up per foot, aggregate will cost $4.75 and up per foot, and glass tile will cost $30 and up per foot.
DIY Concrete Pool Cost
Your typical concrete swimming pool cost will start at around $60,000 if done by a licensed contractor. When you take it into your own hands, the price can vary widely depending on how you choose to build your pool.
On one extreme end, some people have been able to construct makeshift concrete pools for several thousand dollars using cinder blocks. This will give you a pool that you can swim in, but it might not offer the quality or appearance that you're looking for.
Overall, you might not save much money on equipment or materials with a DIY concrete pool, but you might save some money on labor; might. As a whole, you may be able to save around $1,500 to $5,000 or more by going the DIY route (depending on how much of the work you can do yourself), but you have to be careful to avoid mistakes along the way. Otherwise, you could end up spending much more trying to fix them.
DIY Concrete Pool vs DIY Vinyl Liner Pool vs DIY Fiberglass Pool
The vast majority of people who build a DIY inground pool choose a vinyl liner pool. Vinyl liner pool kits offer a wide range of shapes, colors, and styles, and most of what you need to create the structure of the pool comes in the box. They are also cheaper to buy and install, even if you get a licensed contractor to do it for you.
With a DIY fiberglass pool, the pool shell is already built for you, and all you have to do is install it in the ground. Concrete pools, on the other hand, need to be built entirely from scratch. Even though fiberglass pools are comparatively easier to DIY than concrete, they're by no means easy.
*River Pools does not sell fiberglass pools for DIY projects.
If you’re concerned about the cost of your DIY inground pool, it’s important to note that a vinyl liner pool will be your cheapest option, while concrete and fiberglass will cost about the same. The main thing that can set the cost of fiberglass and concrete apart is the time that it takes to build the pool.
As a general rule, the more days that you need to rent equipment, the more your project will cost. This makes it likely that a DIY concrete pool will cost more than a DIY fiberglass pool. Remember, fiberglass pools only take about 2-4 weeks to install (and that’s with the deck or patio), while concrete pools can take 3-6 months.
Thanks for stopping in! While we specialize in fiberglass pools, we provide helpful resources on all types of inground pools. If you want to learn more about your inground pool options and get an in-depth comparison of fiberglass, concrete, and vinyl liner pools, be sure to download your free ebook below.
With that, we offer our final piece of advice: hire a professional to install any pool you choose to add to your backyard.

Interested in exploring your fiberglass pool options? Check out our learning center, try out our fiberglass pool cost calculator, or click the button below to get in touch with an independent installer and request pricing.

Up Next:
DIY Inground Pools: Costs, Types, and Problems to Consider
What Can You Expect From a Fiberglass Pool Kit?
Should You Buy a Fiberglass Pool? (Infographic)
Editor's note: This article was originally written by Jason Hughes and was updated on December 13, 2024, with current information. River Pools is a brand of inground fiberglass pools produced in a manufacturing facility in Fortville, IN. While our expertise is in manufacturing fiberglass pools, we have access to a network of installers with expertise relating to project design, installation, and pool service. We often tap into this knowledge base and share information freely with homeowners, just like you, considering installing a swimming pool in your backyard.
Topics: