


Fiberglass Pool Information | Installation & Construction | Pool Manufacturing Process
A lot goes into the manufacturing and installation process for a fiberglass pool. It’s especially hard to make sense of all those steps when the explanation includes a lot of pool and science jargon, regardless of whether you’d like a refresher on the basics of a fiberglass pool or already know the components.
Theory- and chemistry-based explanations are awesome—and we happily provide them—but sometimes it’s nice to start on the ground level. Or basement level, as the case may be. No judgment here.
There’s two stages to getting your fiberglass pool into your backyard—manufacturing and installation, separately—and we’re going to go over both in normal-people English.
Suggestion: if you’re into videos and visual references, I highly recommend our 8-video YouTube series on River Pools’ manufacturing process, done by our talented videographer, Cristian. My boss didn’t even tell me to add this as a promo; that’s how much I like them.
How are fiberglass pools made?
Our unique Advanced Manufacturing process (as part of The River Pools Way) produces the strongest, most durable fiberglass pools possible.

 This is the manufacturing process River Pools uses:
- Spray the gelcoat onto the mold.
- Apply chopped fiberglass with vinyl ester resin.
- Apply chopped fiberglass with polyester resin.
- Apply woven roving at stress points for additional strength.
- Apply structural comb materials for support.
- Apply the final layer of fiberglass with polyester resin.
- Allow the pool time to cure.
- Remove the pool shell from the mold.
- Trim the excess fiberglass.
- Quality check the pool shell.
1. Spray the gelcoat onto the mold.

We start out with a bright red-orange mold and layer the pool shell on top of that.
The first layer we apply, the inside finish, is what you see when the pool is in the ground for you to swim in. It’s applied as a gel and then hardens through polymerization (chemical bonding that strengthens it). For obvious reasons, it’s called a gelcoat. It’s super smooth and durable, and it’s algae-resistant, which is awesome for you in long-term maintenance.
In our factory we maintain the ideal temperature and humidity and use a specially blended catalyst so that the gelcoat sets at the correct speed and cures (hardens and strengthens) correctly.
This inside finish is pretty and blue, and to be honest, it’s the only pretty part of the pool shell. The outside of the pool is brown, and that’s all you’ll see from this point on as we walk through the manufacturing process. The pool shell won’t look like a pool until we turn it upside down at the very end.
2. Apply chopped fiberglass with vinyl ester resin.

Now we apply the first layer of chopped fiberglass, mixed with vinyl ester resin. That creates a watertight barrier that prevents a phenomenon called osmotic blisters where the gelcoat bubbles and separates from the next layer of the shell.
We use 100% vinyl ester resin for this layer because one high-quality, correctly applied layer is more effective than multiple lower-quality layers.
Caution: many pool manufacturers use vinyl ester resin but at a low percentage. You want maximum vinyl ester for maximum quality. We use 100%. Go big or go home.
When interviewing manufacturers, you should request a copy of their warranty to see if the warranty covers the gel coat in case osmotic blisters form. Read carefully; some are very misleading! You can read our finish warranty here.
3. Apply chopped fiberglass with polyester resin.
This layer uses polyester resin mixed with the chopped fiberglass. Remember, since we first applied fiberglass with waterproof vinyl ester resin, we don’t have to worry about water reacting with the polyester resin now.
4. Apply woven roving at stress points for additional strength.

This roving is a woven mesh of glass fibers. It’s more flexible than the chopped fiberglass we use for the preceding layers, which is why we use it on the most flexible parts of the pool, such as where the side walls meet the pool floor and other areas.

We need the pool to bend and flex, but we also need it to be rigid enough to hold its shape.
Too much flex could cause the gelcoat to crack, and too much rigidity would cause the pool to break when we lift and move it. Neither one is good. That's why the perfect balance of chopped fiberglass and woven roving is so important.
5. Apply structural comb materials for support.
The bottom edge isn’t the only area in danger of over-flexing. The side walls will be pressed on both sides, by pool water inside and earth outside.
We use a honeycomb material to form ribs that help prevent the side walls of the pool from bulging. We also add our structural comb material underneath any steps or benches in the design.


6. Apply the final layer of fiberglass with polyester resin.
We spray the resin/fiberglass mix and roll out any air bubbles for the last time.
Why polyester resin? Because we already have our water-resistant vinyl ester resin layer that protects us from moisture, even from the back side of the pool. No worries about blisters here!
7. Cure in the mold.
Now the pool shell gets to sit in the corner and think about what it did. At River Pools, we let it cure for at least a day.
8. Remove the pool shell from the mold.
Once the fiberglass has completely cured, we attach four chains to the pool shell and raise it up off the mold. A smooth, even release is ideal because it means the shell didn’t stick to the mold. If it stuck, that could mean there was a problem with the gelcoat, the mold, or the laminate itself.
.png?width=248&name=pool%20shell%20separated%20from%20mold%20(smaller%20with%20labels).png "Pool shell separated from mold")
We set the pool shell down on foam blocks.
9. Trim the excess fiberglass.
When the pool shell initially pops off the mold, you can see the scraggly bits of material hanging down off the edges. Nobody wants a pool with a beard. We trim off this material (called overlay) so that you’re left with the nice, crisp edge you signed up for.
We then move the pool shell onto saw horses for quality inspection. (This step would be significantly cooler if they actually looked like horses. But no, they look kind of like easels.)

10. Quality check the pool shell.
After washing the pool inside and out, we look for any cracks, blemishes, or inconsistencies in the fiberglass. While each manufacturer’s process may differ slightly, make sure they quality check the pool shell.
The builder should also weigh the pool shell to make sure it falls within an acceptable range (about 5% of the design specs). A pool that falls outside that range may have insufficient or faulty material.
You can ask for a dig sheet (the design specifications) and compare it to the weight logged on the side of your pool.
How are fiberglass pools installed?
Our ground-breaking Advanced Installation methodology is specially designed to prevent all the most common problems with fiberglass pool installation. No leaks, shifting, bulges, or separation for you!
It only takes about 3–6 weeks to install a fiberglass pool, and bonus: you can actually swim in your pool by the end of day two!
This is our process for installing your pool:
- Excavate the soil.
- Set and level the pool.
- Install the pool’s plumbing and filter system.
- Backfill the pool shell.
- Install the coping and patio.
- Install the pool fence.

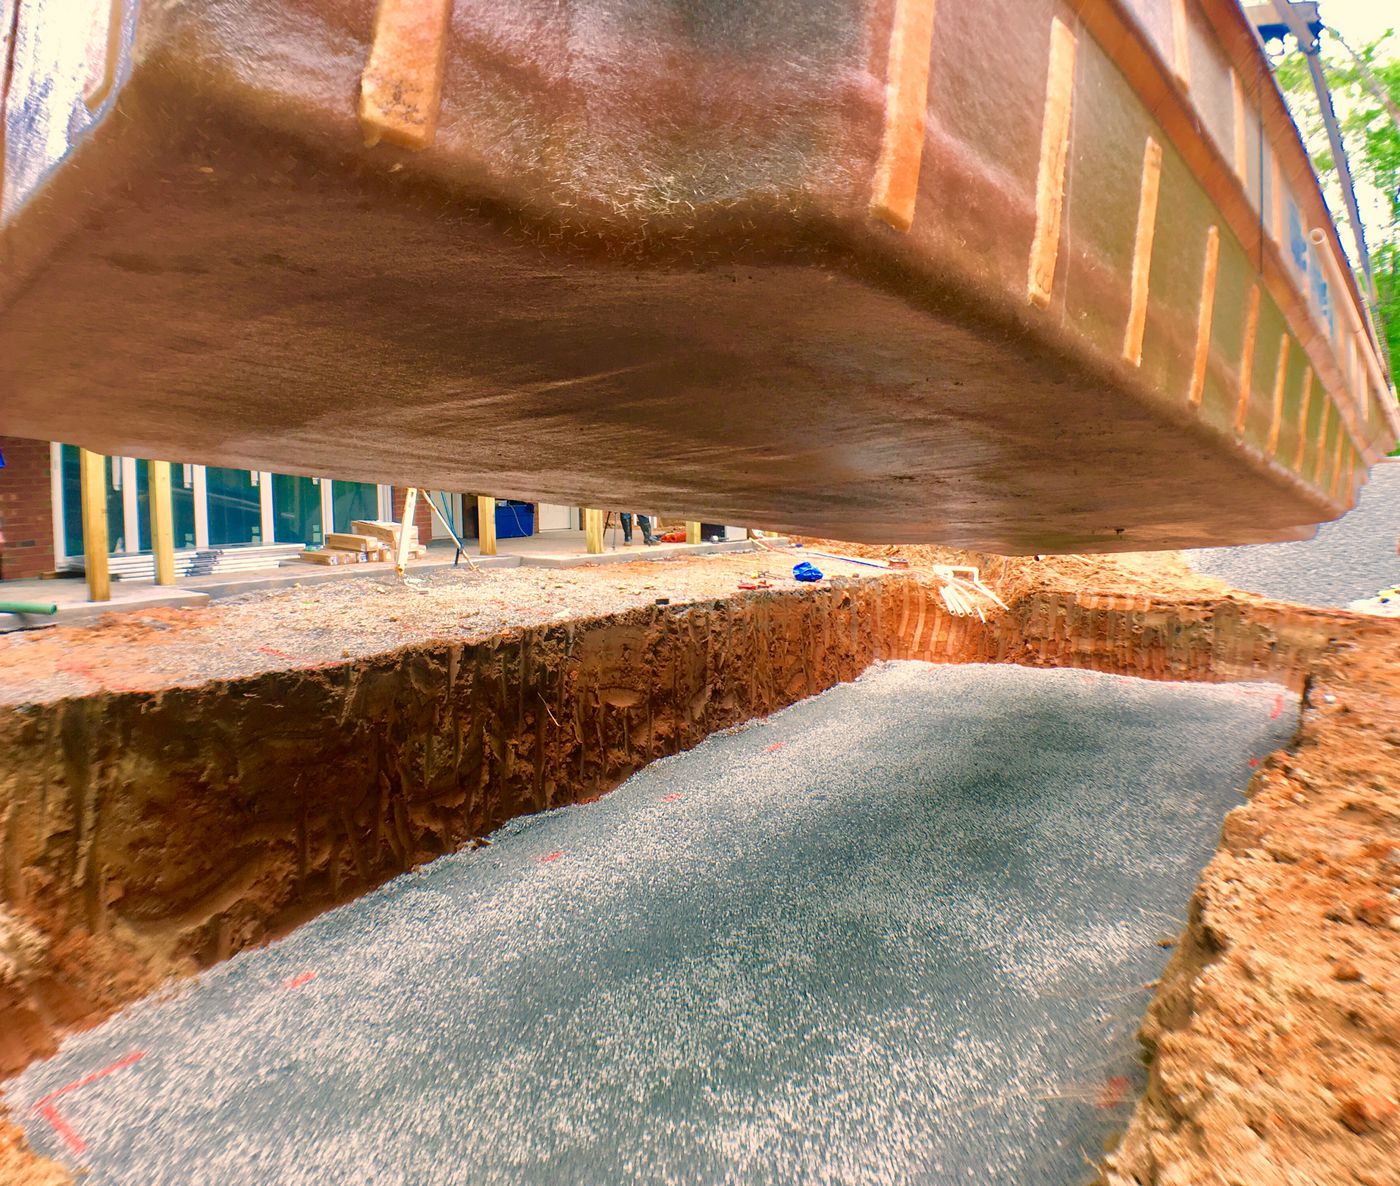
1. Excavate the soil.
We paint the pool on the ground and use a laser level to establish how high to set the pool in the yard. This will tell us how deep to excavate. While one crew member digs the hole, the others begin to set the pump and filter system.
.jpg?width=600&name=FullSizeRender%20-%20Copy%20(2).jpg "Excavation")
This usually takes from three hours to a day and a half, depending on the size of the hole and how long it takes to dispose of the dirt.
2. Set and level the pool.
We place a 2-inch-thick layer of gravel in the hole the pool will rest on. This gravel base determines the height of the pool.

This usually concludes by the end of day one or by the end of day two depending on the project.
3. Install the pool’s plumbing and filter system.
We run all the plumbing around the pool shell before placing it in the hole. This gives us more room to work and allows us to visually inspect every fitting and piece of pipe thoroughly to ensure it meets our standards.
We typically begin this process as soon as the pool is unloaded from the truck.
In this photo, a member of the customer's household came by to look over our PVC pipes:

4. Backfill the pool shell.
Our team usually has the pool shell installed and full of water with all of the plumbing completed by the end of day two or three.
You can actually swim in the pool at this point!
5. Install the coping and patio.
We complete an inspection before installing the coping and patio.
Depending on the weather and our schedule, it's not unusual to have a delay of one to two weeks between backfilling the pool and constructing the coping and patio.
The patio can take anywhere from two to five days to install depending on the size of the patio and material used.
6. Install the pool fence.
Any inground pool needs to have a fence that meets safety regulations. Typically we install your approved fence by digging post holes in the ground outside of the pool patio and using concrete (in sacks, not sprayed) to secure the fence posts in the ground.
It may take a few days to a week to install the fence.
So here's the summary of all that information:
What do the customers think?
We've developed these unique methods—Advanced Manufacturing and Advanced Installation—because we want to provide the best value, above and beyond the industry standard.
But methods only go so far if the customers aren’t happy with the end result. We encourage you to ask for customer references from your chosen manufacturer and installer. Take a look at our own written and video references of happy buyers!
You can also click the GuildQuality Emblem below to view a live stream of ratings and reviews from our customers.

Can I learn more?
Nope, we want to withhold all other information. Sorry.
Kidding!
We want to help you make the best decision for your dream pool, so compare all three pool types. Decide what you'll use the pool for and look for designs that fit those needs. And remember that for the highest-quality, lowest-maintenance fiberglass pool, you need to look for The River Pools Way.
River Pools is based in Virginia and manufactures fiberglass pools for distribution throughout North America. If you would like to find a dealer, or if you live in Virginia or Maryland and would like to talk to us about installing your pool, contact us here.
You can also download our ebook that goes through all the details about buying a fiberglass pool.

Up Next:
How to Customize a Fiberglass Pool
Fiberglass vs. Vinyl Liner vs. Concrete Pools: An Honest Comparison
Editor's note: This blog article was updated on January 2, 2019.